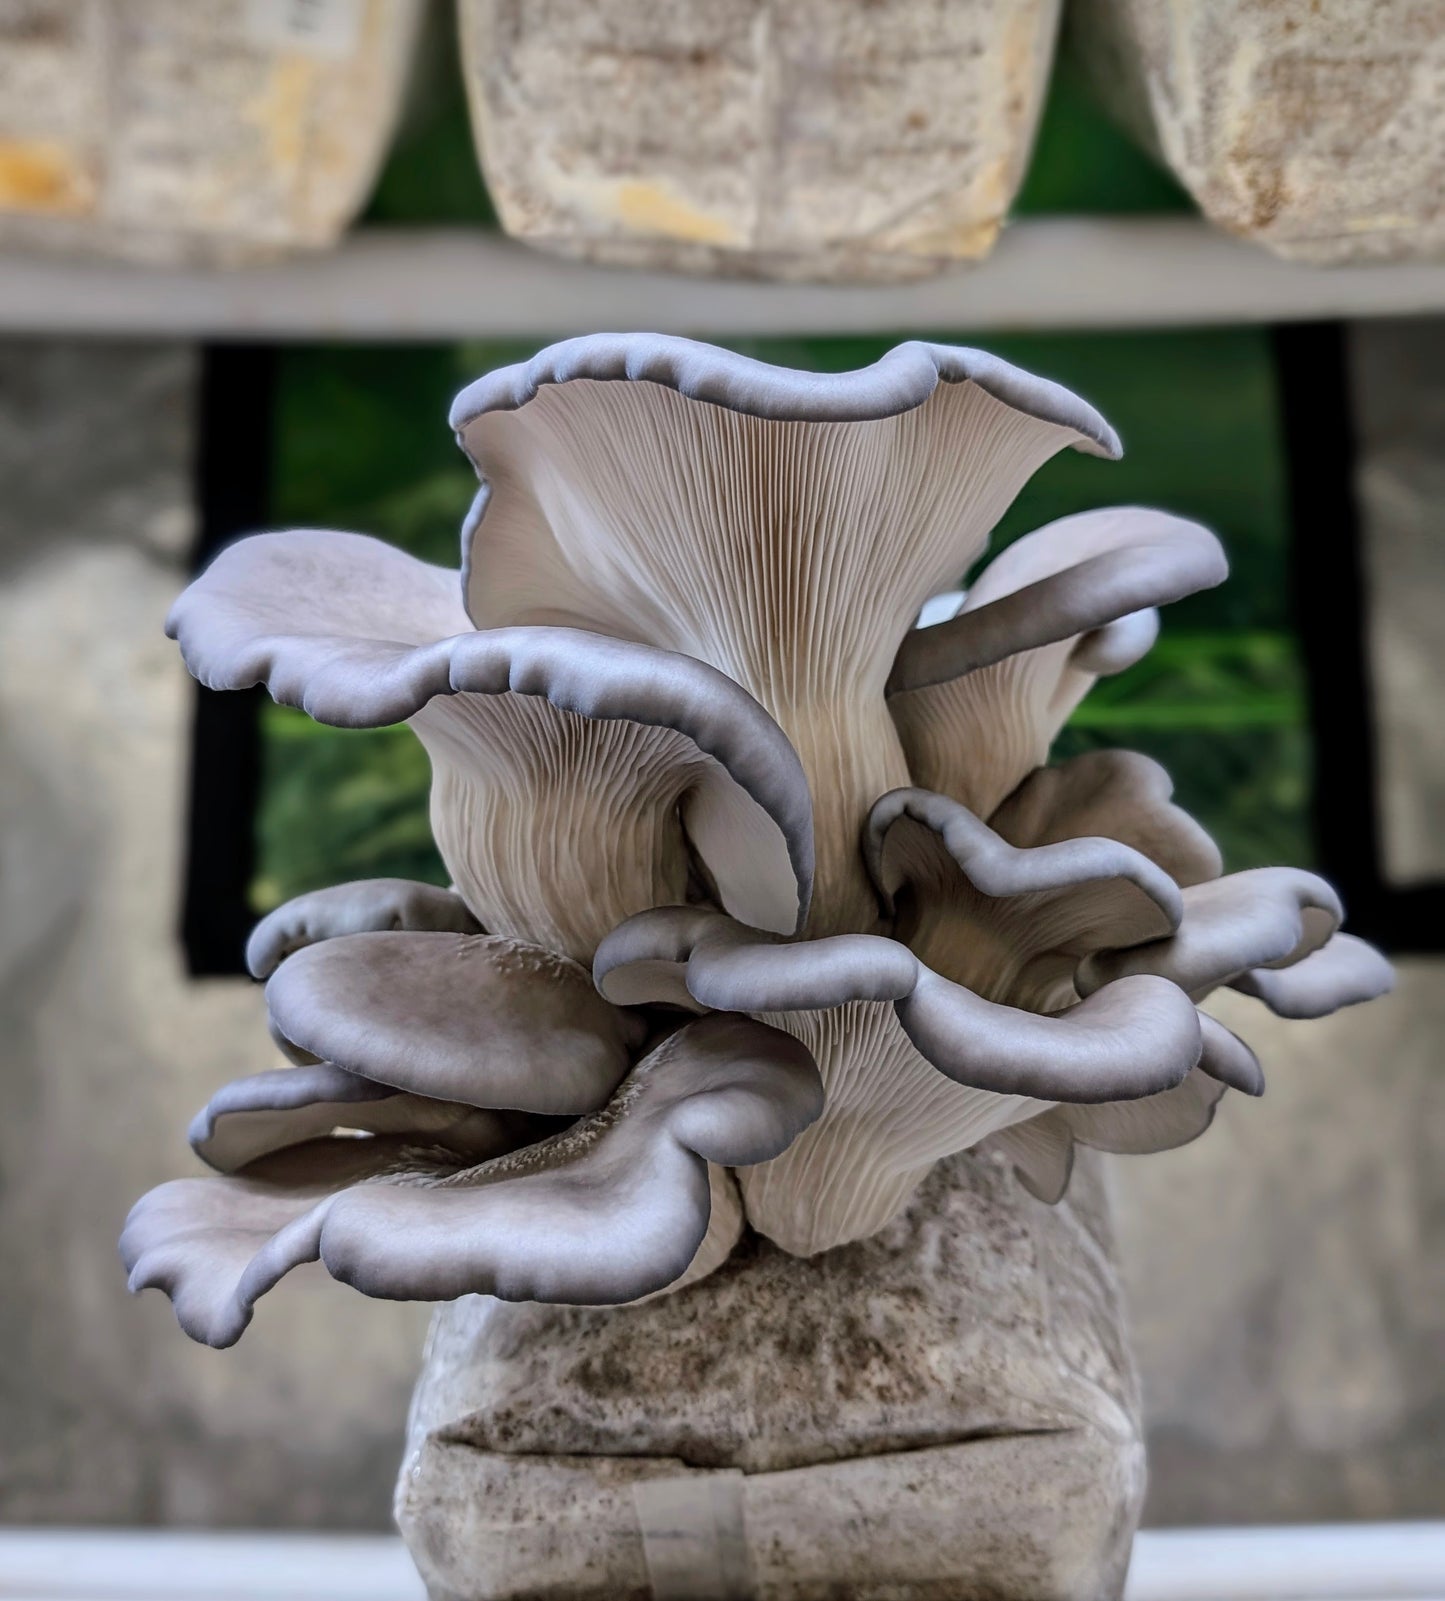
Blue Oyster Mushroom Grow Kit
Grow beautiful and delicious Blue Oyster Mushrooms at home with this premium 5 pound mushroom grow kit. Perfect for beginners, foodies, gardeners, and mushroom enthusiasts, this easy to use kit lets you grow fresh gourmet mushrooms right on your kitchen counter. No experience, grow tent, or special equipment is needed, just mist daily with the included spray bottle and watch your mushrooms flourish in no time at all.
This Blue Oyster strain is known for its vibrant blue caps, rich umami flavor, and tender texture, making it perfect for stir fries, soups, pasta dishes, and more. This kit is a fun and sustainable way to grow your own food, save money, and enjoy a rewarding growing experience. It also makes a unique and thoughtful gift for mushroom lovers and home chefs alike.
Each kit is handmade in the USA using all natural ingredients by our family owned small business. Includes a spray bottle, easy to follow instructions, and ships with USPS tracking. As a living product, please bring your kit inside promptly upon delivery to avoid exposure to extreme temperatures.
Buy blue oyster mushroom grow kit, blue oyster mushroom kit, grow mushrooms at home, beginner mushroom growing kit, kitchen counter mushroom kit, gourmet mushroom grow kit, Hericium spawn kit, indoor mushroom farm, 5 pound mushroom block, spray and grow mushroom kit, fresh mushroom kit, all natural mushroom grow kit, handmade in USA mushroom kit, culinary mushroom growing, sustainable mushroom growing, mushroom gift idea, grow your own mushrooms, edible mushroom kit, oyster mushroom cultivation kit.
Detailed Blue Oyster Mushroom Growing Instructions:
Start by selecting a clean spot in your kitchen with indirect natural light and a stable temperature between 60 and 70 degrees Fahrenheit. Unbox your mushroom grow kit and locate the marked fruiting area on the bag. When you’re ready to begin, use a clean knife to make a slice directly where it’s marked. This slice creates an opening for the mushrooms to grow from.
Place a small clean towel, folded, in the bottom of your casserole dish. Pour a small amount of clean water into the dish so the towel becomes damp but not submerged. Set the grow kit upright in the dish, directly on top of the damp towel, with the sliced area facing out or slightly upward to allow for airflow and mushroom formation. There’s no need to open the top of the bag or disturb the contents inside.
Use a clean spray bottle filled with water to mist around the sliced area two to three times a day. Spray the air surrounding the slice and the inner sides of the casserole dish to maintain humidity, but do not spray the mushroom itself or the exposed substrate directly. Moisture sitting on the mushroom or substrate surface can lead to rot or contamination. The goal is to raise ambient humidity, not soak the kit.
To help trap humidity, drape a clean, damp towel loosely over the entire setup like a tent. Keep the towel slightly elevated so it doesn’t rest against the sliced area. You can re-wet the towel once a day by misting it or briefly soaking and wringing it out so it stays lightly damp. The towel will act as a simple humidity dome.
You’ll begin to see tiny primordia, or pins, forming at the slice once the conditions are right. Mushrooms can be unpredictable, some will pin in about a week while others may take longer. Keep misting the air around the block and make sure the towel stays damp, but avoid spraying directly on the developing mushrooms. As long as the environment remains humid and well ventilated, they’ll continue to grow and mature naturally.
Harvest the when fully mature but preferably before the mushrooms release spores. Use a clean knife to cut the mushroom off at the base, as close to the grow block as possible. After harvesting, tape over the opening where the mushrooms grew from and make a new slice at another location on the bag and repeat the process.
Once the block stops producing, you can compost it or bury it under wood chips outside to potentially yield mushrooms in the future.
Now for troubleshooting.
If no mushrooms appear after two weeks, the most common cause is low humidity or poor airflow. Try increasing how often you mist the air around the kit and briefly lift the towel for few minutes each day to refresh the air. Make sure the kit is not kept in a very dry, cold, or hot location.
If pins form and then dry out or stop growing, humidity is too low. Mist more frequently and keep the towel slightly wetter. You can also loosely tent the entire dish with a large clear container or bag with holes to trap more humidity.
If the mushrooms look yellow it could be a lack of humidity or too much humidity. If they grow very slowly, or develop a fuzzy texture, there may not be enough air circulation and too much humidity.
If you see green, black, or pink mold, that’s a sign of contamination. This may be due to direct spraying or poor air exchange. Do not spray the mushroom or substrate surface. Remove any small, contaminated areas with a clean knife. If the contamination spreads, dispose of the block.
If your kitchen air is especially dry, you can place the whole dish setup inside a larger clear bin or tote, with the lid propped open slightly for air. This will help trap moisture without suffocating the kit.
- Choosing a selection results in a full page refresh.
- Opens in a new window.


